-
E-mail
bj6213@126.com
-
Phone
13261994018
-
Address
Room 305, Building 22, No. 10 Rongcheng North Road, Huairou District, Beijing
Product Categories
- High standard farmland construction equipment
- Plant Protection Meteorological Station
- Meteorological monitoring equipment
- Micro meteorological station
- ultrasonic sensor
- Integrated water and fertilizer equipment
- air quality
- Integration of water and fertilizer
- Plant protection equipment and instruments
- meteorological equipment
- sensor
- Soil equipment
- Plant protection instruments and equipment
- Hydrology and Water Conservancy
- Soil moisture, soil moisture, hardness, compactness equipment
- Smart Agriculture
Beijing Mengchuang Weiye Technology Co., Ltd

MC-GSW Ultrasonic Tube Type Automatic Soil Moisture Monitoring System
NegotiableUpdate on 05/07
- Model
- Nature of the Manufacturer
- Producers
- Product Category
- Place of Origin
Overview
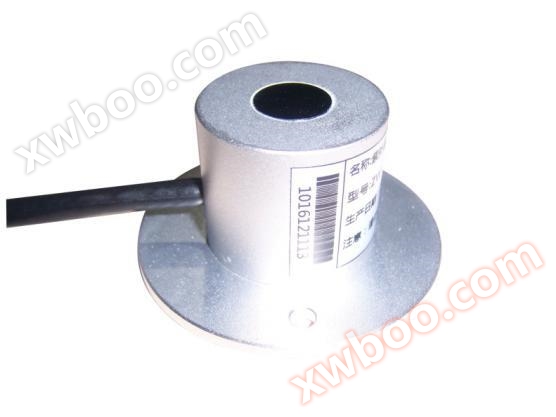
MC-GSW Ultrasonic Tube Type Automatic Soil Moisture Monitoring System
Product Details
MC-GSW Ultrasonic Tube Type Automatic Soil Moisture Monitoring System

1、 Product principle and application:
Pipe type automatic soil moisture monitoring station, also known as ultrasonic pipe type soil moisture monitoring station according to its working principle, is an ABS plastic pipe with built-in ultrasonic signal transmitter and wireless signal receiver. The ultrasonic generator emits high-frequency pulse signals at a frequency of 1GHz in the soil, and then reflects back to provide feedback signals. Due to the basic linear correspondence between the time difference of emission and reflection and the soil moisture content, the soil moisture content data is calculated based on this principle. According to this working principle, environmental factors such as soil salinity and acidity have little impact on testing accuracy. At the same time, it is resistant to external electromagnetic interference and can dynamically observe soil moisture and temperature data for different soil layers. Moreover, it enables fast, accurate, and comprehensive observation, allowing professional technicians to timely grasp soil moisture content and temperature.
The automatic soil moisture monitoring station adopts a layered observation structure, with one temperature observation point on the ground and one soil temperature and humidity measurement point at different depths below the surface of the underground soil according to user needs, to observe the soil temperature and humidity within the corresponding range.
2、 Product Features:
1. 32-bit MCU, with faster computation speed and higher accuracy;
2. Tube type integrated structure, supporting layered measurement, making multi-layer data acquisition more convenient;
3. The number and depth of sensors can be selected according to project requirements;
4. Integrated tube design: The battery, sensor, motherboard, communication module and other components are all designed in the same tube, and each sensor is designed with an integrated tube structure. The sensor is a fully enclosed multi depth sensing unit with higher integration;
5. During installation, the profile is not damaged, resulting in less damage to the soil and easier protection of the on-site environment;
6. No calibration, no on-site calibration, lifetime maintenance, 15 minute field installation, equipped with switch buttons, and can be started or stopped freely;
7. It has the characteristics of low power consumption, small size, easy to carry and move, and simple installation, operation, and maintenance;
3、 Technical parameters:
1. Soil moisture (volumetric moisture content) measurement range: dry soil to saturated soil, laboratory measurement accuracy: ± 3%, field measurement accuracy: ± 5%, humidity resolution: 0.1%, temperature resolution: 0.1 ℃;
2. Temperature measurement range: -40 ℃~80 ℃, measurement accuracy ± 0.5 ℃, temperature resolution: 0.1 ℃;
3. Power supply method: Optional adapter DC12~24V wide voltage power supply or built-in lithium battery power supply;
4. Communication method: RS485 communication, MODBUS communication protocol, (baud rate 9600 can be set, address 0-255 can be set); LORA wireless communication, GPRS wireless communication;
5. Wiring method: RS485 output 4-wire system, power supply positive, power supply negative, 485+, 485-, LORA/GPRS wireless transmission wiring is built-in;
6. Response time: respond within 3 seconds after power on;
7. Stable time: about 10 seconds after power on to enter the stable process;
8. Dimensions: ϕ 63mm, length varies with the number of sensors, standard length is about 1000mm;
9. Sensor measurement principle: FDR frequency domain reflection method;
10. Power consumption: The static power consumption is less than 10mA, and the sampling power consumption is 70 mA;
11. Working environment: 40 ℃ to 80 ℃; 0-100%RH;
12. Above ground level: IP67; Below ground level: IP68;
13. Execution standards: Q/HDIST 001-2012, SL364-2006 "Soil Moisture Monitoring Specification of the Ministry of Water Resources"

4、 Installation Guide
4.1 Preparation work
4.1.1 Open box inspection
Check if the outer packaging is damaged; Open the box and check if the equipment and accessories are complete according to the equipment list.
Attention: Earth drills and solar panels are not included in the factory accessories of Zhishui. If you need them, you can purchase them separately.
4.1.2 Tool Preparation
Earth drill, purified water or tap water, basin, gloves (prepared according to personal needs)
4.2 Formal Installation
4.2.1 Installation location selection instructions (applicable to agricultural crops)
a. Install equipment after sowing crops;
b. The installation location is on a flat terrain;
c. Under comprehensive irrigation conditions, priority should be given to selecting areas with less water harvesting as monitoring locations; Under local irrigation conditions, select moist areas as monitoring locations;
d. Select locations where crop growth is balanced and can represent the majority of crop growth;
e. To understand the root distribution of the monitored crops, it is generally recommended to choose a location closer to the water absorbing roots of the crops.
f. Choose to build a station on a plot of land with strong signals such as GSM/GPRS that can accurately send data SMS messages normally
4.2.2 Drilling
a. After completing the soil sampling drill bit, handle, and support rod, place the soil sampling drill vertically on the ground, hold the handle tightly with both hands, and slowly rotate it clockwise. (Attention: Do not apply too much force, make sure to rotate slowly for a few more turns to prevent the drill bit from deviating and causing the hole to become crooked)
b. Remove the soil drill from the hole and place it in a basin. Use tools to collect the drilled soil into the basin for mixing with the mud. (Note: The first drilling soil will not be collected due to excessive impurities)
c. Repeatedly drilling and taking soil as mentioned above, and during this process, try to gently insert the sensor into the hole (do not forcefully touch the bottom of the device) to test whether the depth of the hole is appropriate; If there is any lag, use a soil drill to correct it and ensure that the sensor is smoothly inserted and removed; Until the hole depth is flush with the installation position marked by the sensor, the drilling is completed.
4.2.3 Mud and Mud
a. Pick out soil impurities such as stones, roots, and insoluble soil blocks from the pot. Grind the soil fine to mix with the mud.
b. Pour in an appropriate amount of water and stir thoroughly until viscous; Loam mud generally cannot be thicker than sesame paste; Complete with mud.
4.2.4 Grouting installation
a. Slowly pour the mud into the hole, about 1/2 of the hole position; It can be adjusted according to the actual situation.
b. Slowly insert the sensor into the hole, rotate it in one direction and press it down. If the speed is too fast, it may cause the bubbles to not be completely expelled. (Note: During the process of rotating and pressing down again, do not pull up the sensor to prevent gas from being sucked into the hole again)
c. After the sensor is installed at the correct depth, some mud will overflow around the equipment, and grouting is completed; At this point, the installation depth of the sensor is flush with the hole opening. (Note: Remove any excess mud beyond 3cm around the sensor to prevent clumping from affecting water infiltration)

4.2.5 Installing solar panels (users who do not require solar power supply panels do not need to perform this step)
a. Site selection for solar panels
The installation position of solar panels should be as far away from sensors as possible, generally 50cm away from the sensor, but should not exceed the length of the power cord. The panel of the solar power supply panel should face towards the direction of the sun, that is, south, and there should be no obstruction in front as much as possible.
The solar panel bracket can be inserted into the selected position using two methods: discrete pole type and tripod type.
b. Fixed solar panel
Fix the solar panel panel onto the bracket, align the four holes in the center of the panel with the four holes on the bracket, and then tighten them with screws.
c. Connect the solar power panel to the measuring instrument
Firstly, connect the wiring terminals on the panel and bracket together and screw them together;
Secondly, to connect the solar interface of the device, it is necessary to pull out the top cover of the device upwards. On the opposite side of the switch is the solar interface (aviation jack); Align the other end of the bracket power cord with the interface and insert it. Tighten the bolt to complete the installation of the solar panel.

4.2.6 Installation completed
After pulling out the top cover of the device upwards, press the power button to activate the device. It is recommended to resume normal work after the mud has returned to its normal state.
Other precautions:
1. Key points for sand installation
The installation steps for sandy soil are no different from those for loam soil. It is important to prepare sufficient water, not less than 5L. Before grouting, pour water into the hole and wet the entire wall until excess water appears at the bottom of the hole. Then, following the steps, slowly pour the mud into the hole, approximately at 1/2 position of the hole. The remaining installation steps can refer to the installation of loam soil.
2. Key points for clay installation
The installation of clay is carried out after drilling and collecting soil, cleaning impurities, and soaking the clay in water for more than 4 hours to soften it and facilitate the formation of a relatively uniform slurry. After soaking, stir until viscous, and then grout. The remaining installation steps can refer to the installation of loam soil.
5、 Precautions and troubleshooting
1. Please read this manual carefully before use to ensure that the sensor is installed correctly, the power supply is correct, and the configuration is correct;
2. Prevent direct damage to the sensor from chemical reagents, oil, dust, etc. Do not use it for a long time in environments with condensation or extreme temperatures, and do not subject it to cold or hot shocks;
3. The instrument belongs to precision components. Users are advised not to disassemble it by themselves to avoid damaging the product;
4. Please keep the corresponding certificates of conformity and documentation, and return them along with the product during maintenance.

6、 Introduction to Cloud Platform Software System:
1. Design a user-friendly environmental monitoring and management system using visual programming language to achieve remote monitoring of the monitored environment. You can freely set the upper and lower limit values. Alarm through SMS and other means. The software platform can remotely monitor real-time data from various sensors. Complete data management functions, supporting database management, data query, export, printing, statistical analysis, chart analysis, and other data processing
2. The manifestation of online monitoring of various environmental factor parameters:
A、 The detailed list format allows for a visual view of the monitoring data of various environmental factor parameters at a certain point in time.
As follows:

B、 The display method of the curve trend chart is as follows:

C、 Column style trend display, as follows:

3. Support mobile viewing anytime. Method:

4. View real-time and historical data of various parameters on the computer:

Contact Information: Beijing Mengchuang Weiye Technology Co., Ltd
Marketing Department: 4-3-114 Beiqing Creative Park, Zhongguancun Life Science Park, Beiqing Road, Changping District, Beijing
R&D Department: East Campus of China Agricultural University, Haidian District, Beijing (B202, Science and Trade Building, No.17 Qinghua East Road)
Company Office Number
technical support:
Website: http://www.sul2100.cn
Email: bj6213@126.com