- Phone
-
Address
No. 6, Lane 1118, Jintong Road, Putuo District, Shanghai
Product Categories
Shanghai Kangdeng Electric Technology Co., Ltd


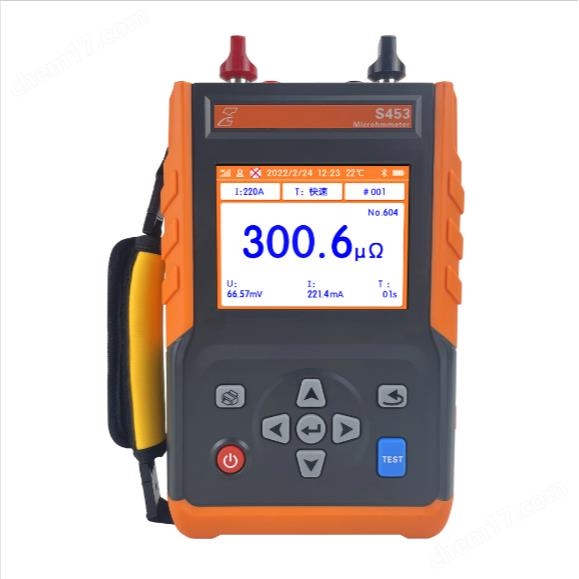
Transformer DC resistance tester
NegotiableUpdate on 05/13
- Model
- Nature of the Manufacturer
- Producers
- Product Category
- Place of Origin
Overview
The ZZC-10F transformer DC resistance tester adopts a new power supply technology, which has the characteristics of stable performance, fast measurement, small size, easy use, high measurement accuracy, and good data repeatability. It is an ideal device for measuring the DC resistance of transformer windings and high-power inductive equipment.
Product Details
1 ZZC-10FTransformer DC resistance testerOverview
The measurement of DC resistance is a necessary item for semi-finished and finished product factory testing, installation, handover testing, and preventive testing in the manufacturing of inductive coils such as transformers, transformers, reactors, and electromagnetic operating mechanisms. It can effectively detect manufacturing defects such as material selection, welding, loose connection parts, missing strands, and broken wires of inductive coils, as well as hidden dangers after operation. In order to meet the needs of rapid measurement of DC resistance in inductive coils, our company has developed the ZZC-10C DC resistance tester using our own technological advantages. This instrument adopts a new power supply technology, which has the characteristics of small size, light weight, large output current, wide range, digital display, and two power supply modes: mains power and internal lithium battery power supply. The whole machine is controlled by a microcontroller, with multiple current gear selection, data processing, display and other functions, and has discharge indication function. The instrument has high testing accuracy, easy operation, and can achieve rapid measurement of direct resistance.
IISafety measures for ZZC-10F transformer DC resistance tester
1. Before using this instrument, be sure to read this manual carefully;
2. This instrument can be used both indoors and outdoors, but should be avoided from places such as rain, corrosive gases, etc. Instruments should avoid severe vibrations;
3. The maintenance, care, and adjustment of instruments should be carried out by professionals;
4. After the test is completed, be sure to wait for the discharge alarm to stop before turning off the power and removing the test line;
5. When measuring an unloaded voltage regulating transformer, be sure to wait for the discharge indicator alarm sound to stop before switching gears;
6. During the testing process, it is prohibited to move the test clip or turn off the power supply line.
Three ZZC-10FTransformer DC resistance testerperformance characteristics
1. The instrument has a high output current and is lightweight;
2. The instrument provides 7 output current options, with a maximum output of 10A current;
3. Equipped with * protection circuit, more reliable performance, with sound discharge alarm to reduce misoperation;
4. The measuring range of the instrument is 0.5m Ω -100K Ω, and the measurement results can be converted to temperature;
5. The instrument is equipped with a three-phase unbalance rate calculation function, which allows for quick and intuitive comparison of historical data;
6. The instrument can be optionally powered by a built-in lithium battery and equipped with an independent charging system for easy on-site operation;
7. The instrument is equipped with a 7-inch color LCD screen with a resolution of 800 × 480 pixels, and can be configured with Chinese/English operation menus for real-time printing and output of results;
8. Two power supply methods, AC and DC, meet the measurement needs of different sites;
9. Equipped with RS232 interface, it can transmit test data to the backend;
10. This machine is equipped with storage function, which can store 1000 test records;
11. Equipped with a USB interface, it can transfer test data to a USB drive;
12. The parameter settings are more precise, allowing for the setting of the transformer's test winding, tap position, test phase, test sample temperature, converted temperature value, winding material, etc.
4 ZZC-10FTransformer DC resistance testertechnical indicators
1. Output current: 10A, 5A, 1A, 100mA, 10mA, 1mA, automatic;
2. Range:
AC/DC:
0.5mΩ~1.6Ω (10A 档)
4mΩ~3.2Ω (5A 档)
20mΩ~16Ω (1A 档)
200mΩ~100Ω (100mA 档)
2Ω~2kΩ (10mA 档)
100Ω~100kΩ (1mA 档)
0.5m Ω~100 Ω (automatic)
3. Accuracy: ± (0.2%+2 words);
4. Resolution: 0.1 μ Ω;
5. Working temperature: -20~40 ℃;
6. Environmental humidity: ≤ 80% RH, no condensation;
7. Altitude: ≤ 1000 meters
8. Working power supply: AC220V ± 10%; 24VDC/6Ah lithium battery;
9. Dimensions: 323 * 275 * 135mm;
10. Weight: 4.77kg;
5ZZC-10FTransformer DC resistance testerSystem Introduction
The instrument panel is shown in the following figure:

Figure 1
1. I+, I -: Flat cap terminals are used for current output/input, with red indicating positive and black indicating negative; The wiring is secure.
2. U+, U -: Voltage input terminals, red is positive and black is negative.
3. LCD: 7-inch color large screen backlit LCD display, displaying menus, current, and resistance values, etc; Long term exposure to sunlight and heavy pressure should be avoided.
4. Switch: Button switch for instrument power control. When connected to the mains power, the entire machine is powered by AC power supply; When not connected to mains power, the entire machine is powered by internal lithium batteries; The instrument needs to be long pressed for 3 seconds to shut down.
5. RS232: The instrument adopts a standard RS232 interface and is connected to the serial communication port of a PC or laptop. To ensure normal communication, both parties should set the same baud rate and communication address. Communication protocol: The instrument and PC communicate according to the specified protocol, operate the instrument in real-time, and achieve functions such as setting, measurement, data storage and transmission. Attention: The instrument should be remotely controlled within line of sight to ensure that personnel are away before starting the measurement.
6. USB port: the connection and communication interface between the instrument and the USB flash drive, used to export memory data; You can use a USB flash drive to import data as a transmission port; You can connect your phone's data cable to your computer for charging and data transfer.
7. Printer: Micro thermal printer, which will print data and information upon completion of testing, display or retrieval of data. Paper exchange and ribbon: Thermal printer, using thermal printing paper with a width of 58mm. When changing paper, open the paper compartment cover of the printer, put in the paper roll and leave a small part outside, then close the cover.
8. Power socket: The instrument is connected to the mains port and charging port. Commercial power port: The required voltage is 180V~270V 50Hz/60Hz, and a built-in 2A fuse is also included. The fuse socket is integrated with the low-voltage power socket, and the fuse specification is 5A/250V, with a size of φ 5 × 20mm. Note: Fuses of the same specification should be used. If the spare fuse still burns out after replacement, it may indicate a malfunction in the instrument and the manufacturer can be notified for handling.
When the instrument is connected to the mains power, charging stops when entering the current selection interface and testing interface, and can be charged normally when entering other interfaces or in the shutdown state.
9. Grounding post: used for grounding the entire machine casing and connected to the grounding wire of the power socket. Ensure that all instruments are reliably and independently grounded. The grounding column should be carefully inspected for paint or rust, otherwise it should be scraped clean.
6、 Testing and operation methods
This machine has two measurement methods: AC and DC. The testing and wiring methods for AC and DC are the same, except for the power supply method.
(1) Test wiring
A、 Single phase measurement method, as shown in the following figure

Figure 2
BThe auxiliary magnetic method wiring is shown in Figure 3-5 (applicable toY(N)-d-11Connection group).

Figure 3

Figure 4

Figure 5
When measuring the low voltage side of large capacity transformers, the maximum current of the DC resistance tester is relatively small, or to speed up the measurement, the auxiliary magnetic method can be selected for measurement. The wiring methods for measuring low voltage Rac, Rba, and Rcb are shown in Figure 3, Figure 4, and Figure 5, respectively.
(二)、操作方法
1. Charging operation instructions:
When the instrument is turned off and the power socket is connected to the power cord, the charging system automatically starts charging;
When the instrument is turned on and the power cord is connected to the power socket, the battery indicator on the interface will display progress flow, indicating that it is charging (charging stops when the instrument enters the current selection interface and testing interface); After the battery is fully charged, the battery icon will no longer be displayed and will show a green full grid state (try to fully charge the battery in one go without interruption during the charging process);
2. Functional operation instructions:
(1) Main interface: Turn on the power switch, and the instrument enters the main startup menu. The interface displays four options: "Direct Resistance Test", "Record Query", "Time Calibration", and "System Settings". Depending on the usage situation, the corresponding option can be selected for operation. The startup interface is displayed as shown in the following figure:

Figure 6
(2)Direct resistance test:Upon startup, enter the main menu interface,ClickDirect resistance test”Menu, enter the current selection interface as followsthe figure belowFirstlyView various types of electricityflowRange of gearsRange,thenAccording to the actual test resultsSize of the test sampleChoose the appropriate oneofTest the current. When notcleartestedsampleresistancevalueSize can be selectedautomatictestThe instrument will automatically select the appropriate output current for testing based on the resistance value of the test sample.

pictureseven
Click on the desired current gear, instrumentExecute test commandAfter entering the testing interface and waiting for the stable charging of the testing current, the LCD display will be as shown in the following figure:

Figure 8
Click to modify according to the actual situation on sitewinding、Phase and winding materialsCategories andTap connection、Test sample temperature, converted temperatureThe parameter values.
Winding:instrumentin turndisplayhigh pressure,Medium voltage, low voltagethreetransformerWinding type, click on the display box to replace the corresponding oneThe test winding;
Different from:The instrument displays sequentiallyAO/BO/CO/AB/BC/CASix sets of transformer windingspartClick on the display box to replacecorrespond toofTest phase;
Winding material:According to the transformerDifferent winding materials,Click on the display box to switchcopper、aluminiumTwo different winding materials are used to calculate different temperature coefficients;
Tap:Click on the display box, and the interface will shownumeric keypadPrompt box, enter the corresponding tap number and clickOKWrite key, clickESCPress the key to return to the testing interface, as shown in the following figure:
Test sample temperature:The default sample temperature of the instrument is20℃, click on the display box, the interface will shownumeric keypadPrompt box, enter measurement environmentdownofsampleTemperature, click“OK”Just save with the key;
Converted temperature:The default converted temperature of the instrument is75℃, click on the display box, the interface will also displaynumeric keypadPrompt box, enter measurement environmentdownConvert the temperature, click“OK”Just save with the key;

Figure 10
After the test is completed, if you need to save the current data, clicksaveButton, interface appears“Saving, please wait”A prompt box indicates that the instrument is saving test data. After a few seconds, the interface will appear“Save completed”A prompt box indicates that the test data has been saved. As shown in the following figure:

Figure 11

Figure 12
After the test is completed, if you need to print the current data, clickprintButton, interface appears“Printing in progress, please wait”Prompt box, the instrument starts printing test data, and the interface will appear after printing is completed“Print completed”Prompt box. As shown in the following figure:

Figure 13

Figure 14
After completion, clickreturnThe button instrument starts discharging, and the LCD display interface has“Discharging, please do not disconnect the wires!”Prompt box and sound alarm, LCD returns to the current selection interface. As shown in the following figure:

Figure 15
Calculate the imbalance rate:Regarding the calculation of instrument imbalance rate, there areOFF/ONtwo kindsstateLoop display, default instrumentOFFclosestate(namelyNot calculating the imbalance rate),Button display after buttonONIn the open state (i.eCalculate the imbalance rate). For example: ClickcalculateUnbalance rateoption, displayed on the interfaceONopenstateAfter selecting the current gear, the instrument enters testing modeinterfaceTo be testedAfter the value stabilizes, Set upThe testing phase isABThen click on itsaveButton SaveTest Record, chooseBack buttondischargeAs shown in the following figure:

picturesixteen
finallyRetest againCAThen click on itsaveButton, LCD display three test results and imbalance rate. As shown in the following figure:

pictureseventeen
finallyRetest againCAThen click on itsaveButton, LCD display three test results and imbalance rate. As shown in the following figure:

Figure 18
Attention: When testing inductive loads, please wait until the discharge alarm sound is over before rewiring for the next measurement, or turn off the power and remove the test wire!
(3)Record query:Power on to enter the main menu interface, click“Record Query "The menu displays the saved record data, as shown in the following figure:

Figure 19
Previous and Next Pages:clickprevious pageButton ornext pageUse the button to flip the page and view the saved test data.
eliminate:Select the clear button, and the interface will display“Clearing in progress, please wait”Prompt box, then delete all test records from the instrument.
Printing:First, select the data column that needs to be printed. Once selected, the font will turn red, and then clickprintButton, displayed in the interface“Printing in progress, please wait”Prompt box, the instrument starts printing the selected test record, waiting for printing to be completed.
exportFirst, select the data column that needs to be exported,Then clickexportButton, if the instrument is not insertedUDisk, displayed on the interface“Please insertUplate”Prompt box, if the instrument has been insertedUDisk, displayed on the interface“Exporting, please wait”Prompt box, the interface will display after the export is completed“Export completed”Prompt box.
Operation completed, clickreturnPress the button to exit the record query menu.
(4)Time correction:Power on to enter the main menu interface, click“Time Correction "Menu, enter the interface, as shown in the following figure:

Figure 20
Clickyear”The “moon”The “day”The “time”The “part”The “second”Display boxes for various items, display numeric keypad on the interface, and press to modify the numerical values of options“OK”Enter the exact value of the key to correct the date and time, as shown in the following figure:

Figure 21
After completing the time and date, clickconfirmButton, the instrument returns to the main menu interface.
(5)System settings:Power on to enter the main menu interface, click“System Settings”Menu, system settings includeInstrument settings、communication parameters、Internal debuggingThree sets of options, internal debugging is used for internal calibration before the instrument leaves the factory. The instrument defaults to the instrument settings sub interface, as shown in the following figure:

Figure 22
Sample number:Click on the display box to pop upnumeric keypadPrompt box, click after completing the inputOKPress the key to save the sample number. If you do not need to modify the sample number, click on the key on the numeric keypadESCPress the key to exit and return to the instrument settings interface.
7、 Precautions
1. Before measuring the reverse tap connection of an unloaded voltage regulating transformer, it is necessary to wait for the discharge to end and the alarm sound to stop before switching the tap points.
2. Before disconnecting, be sure to wait until the discharge is complete, the alarm stops, and the power is turned off before proceeding with the disconnection.
3. When selecting the current, refer to the range in the technical specifications column. When using beyond the range, the interface will display a prompt box saying "If the measured resistance is high, please switch to a lower current gear for testing. When the range is insufficient, the current is too small, resulting in unstable data for large capacity transformers. When these two states occur, confirm the range and select the appropriate range for testing.
Similar Product Recommend