-
E-mail
shrisechina@163.com
-
Phone
18017927123
-
Address
2402 Jinxiao Building, No.1 Lane 36, Biquan Road, Minhang District, Shanghai
Shanghai Ranchao Optoelectronics Technology Co., Ltd
Diagnosis and Self Solution of Oil Analysis Spectrometer Problems
Date: 2025-10-15Read: 0
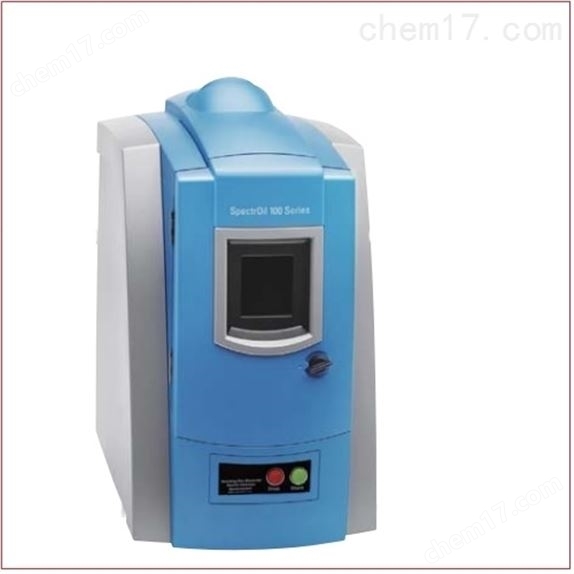
Oil analysis spectrometerIt is the core tool for monitoring the lubrication status of equipment, which can quickly detect metal abrasive particles, pollutants and other components in the oil, providing key data for equipment fault warning. However, in long-term use, various malfunctions often occur due to environmental, operational, or component aging effects. Mastering the diagnosis of common problems and self solving solutions can effectively reduce downtime and ensure testing efficiency.
Fault 1: Unable to power on
Possible reasons: power failure, blown fuse, or power module malfunction.
Solution: Check if the power socket is powered on and confirm that the power cord is securely connected; Open the back cover of the instrument to check the fuse (usually marked at the power circuit). If it is blown, replace it with a fuse of the same specification; If it still cannot be started, contact the manufacturer to test the power module.
Fault 2: Abnormal excitation light source (such as unstable sparks and low intensity)
Possible reasons: electrode contamination, activated carbon deposition, or insufficient gas supply.
Solution: Turn off the instrument and use specialized cleaning tools to clean the electrodes (to avoid scratches) and stimulate the carbon deposition on the platform; Check the pressure of the argon cylinder (≥ 0.5MPa) and whether there is any leakage in the pipeline to ensure that the gas purity is ≥ 99.99%.
Fault 3: Poor repeatability of test results
Possible reasons: non-standard sample preparation, lens contamination, or calibration parameter drift.
Solution: Ensure that the sample surface is flat and smooth (clean after sanding with sandpaper), and the oil sample volume meets the requirements (usually 2-3mL); Clean the optical lens with anhydrous ethanol (to avoid scratches); Run the standard sample calibration program again and update the calibration curve.
Fault 4: Software error "Communication interruption"
Possible reasons: loose data cable, abnormal driver program, or conflicting computer ports.
Solution: Check if the USB/serial data cable between the instrument and the computer is securely plugged in; Restart the computer and instrument, reinstall the driver program; Replace the computer port (such as switching from USB 2.0 to 3.0).
Fault 5: Vacuum system alarm (such as insufficient vacuum degree)
Possible reasons: Vacuum pump oil contamination, pipeline leakage, or pump malfunction.
Solution: Check the color of the vacuum pump oil (replace if it turns black or cloudy); Use soapy water to check if there is any air leakage at the pipeline interface (such as sample chamber, light chamber), and tighten loose joints; If the pump makes abnormal noises during operation, contact the manufacturer for maintenance.
Fault 6: Spectral interference (such as overlapping peaks of non target elements)
Possible reasons: The sample matrix is complex (such as containing a large amount of iron or copper) or the calibration model is not applicable.
Solution: Choose a more suitable matrix matching standard sample for recalibration; If the problem persists, contact the manufacturer to optimize the analysis program or upgrade the software algorithm.
Fault 7: Sample compartment door cannot be closed/sealed tightly
Possible reasons: deformation of the door lock, aging of the sealing ring, or failure of the sample stage to return to its original position.
Solution: Check if the door lock is stuck and manually reset it; Replace the aging rubber sealing ring (usually located on the inside of the door frame); Ensure that the sample stage is pushed into the warehouse to avoid blocking the door.
Fault 8: Slow detection speed
Possible reasons: Insufficient preheating of the instrument, high ambient temperature, or poor heat dissipation.
Solution: Wait for at least 30 minutes to warm up after turning on (longer in winter); Ensure that the instrument is placed in a well ventilated area (ambient temperature 15-30 ℃) and clean the dust from the cooling fan.
Fault 9: Data drift (such as large differences in multiple detection values of the same sample)
Possible reasons: decreased stability of the light source, lens contamination, or irregular calibration updates.
Solution: Check the status of the excitation light source (such as whether the spark gap is uniform) and adjust it if necessary; Clean the optical system; Run the calibration program again after testing 50-100 samples.
Fault 10: Software crashes or freezes
Possible reasons: Insufficient computer memory, low software version, or virus interference.
Solution: Close unnecessary background programs and clean up computer memory; Upgrade to a newer version of the analysis software; Scan the system with antivirus software to eliminate the impact of viruses.
Mastering the diagnostic logic and simple solutions for these common faults can quickly locate the problem and restore instrument operation. If self processing is ineffective, it is necessary to contact a professional engineer to avoid damaging precision components due to misoperation.
Last Article: Working process of infrared spectrometer
Next Article: Working principle and system components of oil monitoring system