-
E-mail
13931789006@139.com
-
Phone
13930795477
-
Address
Building 3, Sunshine Yuecheng, Xian County, Cangzhou City, Hebei Province
Cangzhou Nanhua Experimental Instrument Co., Ltd
Are you worried about installing a concrete rapid freeze-thaw testing machine? Don't worry after reading this article!
Date: 2025-10-21Read: 1
The concrete rapid freeze-thaw testing machine is used to simulate freeze-thaw cycles of -18 ℃~5 ℃, but the equipment has a large volume and complex pipelines. During installation, it is prone to poor cooling effect, water leakage, or electrical failure due to negligence in details. Master the following installation points to easily land the device.
Step 1: Site planning and foundation preparation
Choose an indoor space with good ventilation and away from heat sources (such as boiler rooms, direct sunlight on walls) (ambient temperature 5-35 ℃), and reserve an operating channel of ≥ 80cm around the equipment (convenient for opening doors for sampling and maintenance). The ground should be made of concrete structure (thickness ≥ 15cm), and the levelness should be calibrated with a spirit level. Rubber shock absorbers should be placed at the four corners of the equipment base to reduce operational vibration and avoid resonance damage to the refrigeration unit. If the laboratory does not have a drainage system, a DN50 drainage pipe (with a slope of ≥ 2%) should be pre embedded and connected to the drainage outlet of the testing machine (for discharging defrosting water).
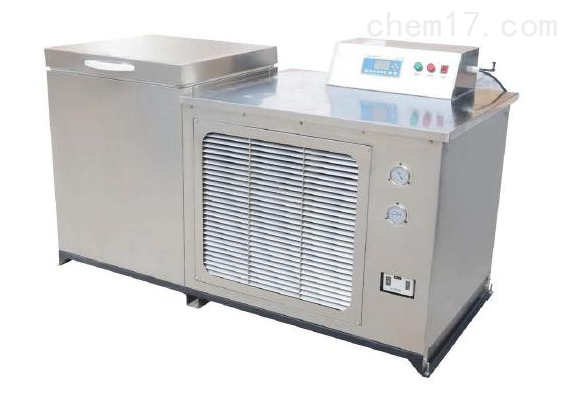
Step 2: Equipment positioning and fixation
Use a forklift or crane to smoothly move the testing machine to the installation position (note that the door is facing outward for easy subsequent operation), and fix the equipment to the ground with anchor bolts (M12 × 100mm, torque 50-60N · m) to prevent displacement during operation. Check the appearance of the equipment (no deformation of the shell, no flattening of the pipeline), and confirm that the connecting cable (usually 3-core power wire+2-core signal wire) between the control cabinet and the freeze-thaw box is not damaged (wrap the joint with insulating tape).
Step 3: Pipeline Connection
Water supply pipeline: Connect tap water or purified water (conductivity<100 μ S/cm) to the inlet of the testing machine (usually marked as "WATER IN"), with a water pipe diameter of ≥ DN20 (to avoid low freeze-thaw efficiency caused by small water flow), and seal the interface with raw material tape (to prevent water leakage). Connect the water outlet to the drainage pipe (or circulating water tank, if equipped with a circulating system) to ensure smooth drainage (without blockage).
Refrigeration pipeline: The copper pipes (high-pressure and low-pressure pipes) of the refrigeration unit (usually air-cooled or water-cooled) have been pre installed, but it is necessary to check whether the insulation cotton (thickness ≥ 20mm) is tightly wrapped (to avoid condensation) and fixed with zip ties (spacing ≤ 20cm). The water-cooled model requires an additional connection to a cooling water tower (water temperature ≤ 32 ℃), and the cooling water pipeline should be checked (valve opening and closing should be flexible, and there should be no leakage).
Electrical connection: Connect the power cord (380V ± 10%, three-phase five wire system) of the control cabinet to the laboratory distribution box (separate circuit, air switch capacity ≥ 20A), and the grounding wire (yellow green dual color wire) must be reliably connected to the grounding pile (grounding resistance<4 Ω) to avoid the risk of leakage.
Step 4: Debugging and Verification
Before powering on, check that all valves are in the correct open and closed state (inlet valve, drain valve are normally open, and refrigeration valve is set according to the instructions). Start the equipment and perform no-load operation (without placing the test piece): Set the freeze-thaw cycle parameters (such as -18 ℃/5 ℃, cycle time of 3 hours), observe the start of the refrigeration unit (the compressor runs with uniform sound and no abnormal vibration), and the temperature sensor display value (the temperature inside the freeze-thaw box should drop from room temperature to -18 ℃ ≤ 60 minutes, with a deviation of<± 2 ℃). Check the water supply system (whether the water level is automatically replenished and whether the defrosting water is smoothly discharged), confirm that there is no leakage or electric leakage, and then place the concrete specimen (100mm × 100mm × 400mm, arranged according to the standard) to start the formal test.
By following these steps for installation, not only can more than 90% of common installation problems such as poor cooling and water leakage be avoided, but the concrete rapid freeze-thaw testing machine can also be quickly put into operation, accurately evaluating the frost resistance and durability of concrete, and safeguarding the quality of the project.